
Windshield replacement is more than a simple repair—it’s an intricate process that restores the clarity, safety, and strength of your vehicle. Every step requires precision, patience, and skill, ensuring that your car is road-ready and your visibility is unobstructed. Whether it’s a tiny crack from a stray pebble or extensive damage caused by a collision, replacing a windshield involves more than just swapping out glass. It’s about reestablishing a structural barrier that protects both driver and passengers. The process combines technical know-how, specialized equipment, and high-quality materials to deliver lasting results. Understanding how it all works not only builds appreciation for the craftsmanship involved but also helps you make informed decisions when it’s time to replace your own windshield. This guide explores the entire step-by-step journey, unveiling how professional technicians ensure your view stays crystal clear and your vehicle remains structurally sound.
Understanding the Importance of a Proper Windshield Replacement
A windshield serves as the first line of defense between you and the outside elements. It reinforces the car’s structure, supports the airbags during deployment, and shields passengers from debris. Over time, even the smallest chip can expand into a web of cracks that compromises visibility and safety. Ignoring these signs doesn’t just risk your car’s aesthetics—it endangers the vehicle’s integrity. When done properly, windshield replacement ensures that the adhesive bonds tightly, maintaining the vehicle’s factory strength.
Professional technicians treat every replacement as a critical repair rather than a cosmetic touch-up. They assess the condition, use precise removal techniques, and follow manufacturer specifications. This process guarantees that the new glass sits perfectly in place, preventing leaks and distortions. The importance of a proper windshield replacement extends beyond appearance—it safeguards the driver, enhances performance, and ensures the vehicle withstands daily stress with confidence.
Initial Inspection and Damage Assessment
Before any tools are lifted, technicians perform a meticulous inspection to determine the extent of damage. A small chip might be repairable, but cracks that reach the edges or obstruct the driver’s view often require full replacement. This assessment helps decide the safest and most cost-effective route. Skilled professionals evaluate both visible and hidden damage, ensuring that what lies beneath the surface is not overlooked.
They also take note of embedded sensors, cameras, or defroster lines attached to modern windshields. These features require careful handling and precise calibration after replacement. By understanding every nuance before starting the process, technicians minimize errors and ensure compatibility with advanced vehicle systems. This initial step sets the foundation for a smooth installation process, ensuring that when the new glass is fitted, it performs seamlessly with your vehicle’s design and technology.
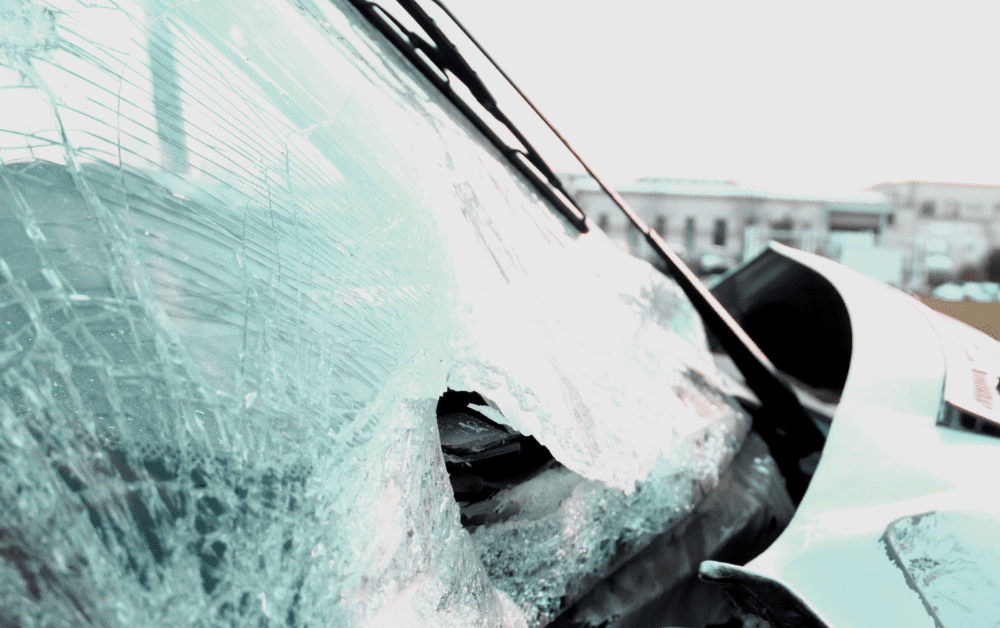
Removing the Damaged Windshield with Care
The removal phase demands patience and skill. Technicians first detach the trim and wipers, then gently loosen the adhesive seal that holds the windshield in place. Specialized tools such as wire cutters or power knives help separate the glass from the frame without damaging the paint or surrounding structure. Precision is key—one wrong move can lead to scratches, dents, or sealant residue that disrupts the new installation.
Once the damaged windshield is safely lifted away, the surface beneath is thoroughly cleaned and inspected. Any leftover urethane is trimmed down to create an even bonding surface. This ensures that the new adhesive forms a solid seal. By approaching removal with caution, technicians preserve the integrity of the vehicle’s frame and prepare it for the flawless installation that follows. It’s a delicate process that prioritizes accuracy and protection at every turn.
Preparing the Surface for Installation
After the old glass is removed, the vehicle’s frame—known as the pinchweld—is carefully prepared. This area must be spotless, as even tiny debris can interfere with the adhesive’s strength. Technicians clean and prime the metal surface, removing any corrosion or dirt. A special primer is then applied to promote better adhesion and prevent rust formation, ensuring the new windshield bonds securely and lasts for years.
This step is often underestimated, yet it’s vital to the overall durability of the installation. The cleanliness and quality of preparation determine how well the adhesive seals the glass to the frame. Proper surface prep eliminates air pockets and prevents leaks during rain or car washes. It’s this meticulous groundwork that transforms a simple glass change into a professional-grade replacement capable of withstanding daily wear and environmental stress.
Applying the Adhesive and Setting the New Glass
The adhesive used in windshield installation is not ordinary glue—it’s a high-strength urethane specifically designed to handle vibration, pressure, and temperature changes. Technicians apply it with precision, creating a uniform bead around the frame. Timing is crucial because the adhesive begins curing immediately upon exposure to air. The new windshield must be placed swiftly yet accurately to achieve perfect alignment.
Once positioned, the glass is gently pressed into place to ensure full contact with the adhesive. Spacers may be used to maintain an even fit and prevent misalignment. The technician checks for gaps and ensures the windshield sits flush against the frame. This careful procedure not only provides a secure bond but also helps maintain the car’s aerodynamics and appearance. Proper adhesive application guarantees a durable, watertight seal that performs like factory-installed glass.
Curing and Setting Time for Maximum Strength
After the new windshield is installed, it needs time to cure. This curing process allows the adhesive to harden and achieve its full bonding strength. Depending on the type of urethane used and environmental conditions, curing can take anywhere from thirty minutes to several hours. During this time, the vehicle should remain stationary to avoid disrupting the adhesive’s alignment or seal.
Technicians often provide clear guidance on when it’s safe to drive again. Rushing this stage can lead to leaks or even detachment during impact. The curing period is as important as the installation itself because it determines how securely the windshield integrates into the car’s frame. A properly cured adhesive ensures that the windshield can support the roof in a rollover and maintain its protective function in every situation, from heavy rain to sudden collisions.
Reinstalling Accessories and Sensor Calibration
Modern vehicles often feature advanced driver-assistance systems that rely on windshield-mounted sensors and cameras. Once the glass is replaced, these components must be reattached and calibrated to restore their accuracy. Calibration ensures that lane departure alerts, adaptive cruise control, and automatic braking systems respond correctly. Skipping this step can compromise the vehicle’s safety performance.
Technicians use specialized equipment to align the sensors precisely as they were before removal. This process may involve static calibration in a controlled environment or dynamic calibration performed while driving. Once calibration is complete, wipers, rearview mirrors, and trim pieces are reinstalled, restoring the vehicle’s original functionality. This combination of precision and technology underscores how windshield replacement has evolved beyond glasswork—it’s a blend of craftsmanship and computer-guided accuracy.
Final Quality Inspection and Leak Testing
Every reputable service concludes with a comprehensive quality inspection. Technicians examine the windshield for proper fit, alignment, and finish. They run water tests to check for leaks, ensuring the seal remains watertight under pressure. Even the slightest imperfection, such as uneven adhesive or gaps in the seal, can lead to future issues, so this inspection ensures that the job meets professional standards.
This phase also includes verifying sensor performance, confirming visibility clarity, and checking interior cleanliness. A properly installed windshield should look seamless—no distortion, no bubbles, and no residue. The final inspection is both a guarantee of quality and a reassurance of safety. When the vehicle leaves the workshop, it’s not just equipped with new glass—it’s fortified with a layer of reliability that protects every mile ahead.
Maintenance Tips After Windshield Replacement
Proper aftercare extends the life of your new windshield. Avoid slamming doors or driving over rough terrain for the first 24 hours, as sudden vibrations can disturb the curing adhesive. It’s also wise to wait before washing your vehicle, allowing the seal to fully set. Gentle care during the initial days prevents unnecessary pressure on the new bond.
Regular maintenance also includes cleaning the glass with non-ammonia solutions to prevent streaks and damage to the tint or coating. Replace worn-out wipers promptly to avoid scratching the surface. By observing these simple habits, you preserve the windshield’s integrity and clarity. Proper maintenance keeps your view unobstructed and ensures your investment in replacement glass continues to provide the protection and durability your vehicle deserves.
Choosing Professional Technicians for the Job
Not all auto glass services are equal. Skilled technicians bring more than experience—they carry precision, certification, and the right tools for every job. Professional installers follow strict safety standards and manufacturer protocols, ensuring each replacement meets industry regulations. Their expertise guarantees that the adhesive cures properly and that advanced sensors function as designed.
Choosing the right service means prioritizing quality over cost. While budget options might seem appealing, improper installation can lead to leaks, rattles, or even windshield detachment during a collision. Professional technicians understand these risks and take every precaution to deliver flawless results. The peace of mind that comes from knowing your vehicle is repaired with care is invaluable. With expert attention, you can trust that your windshield replacement restores both protection and performance.
The Value of High-Quality Materials in Windshield Replacement
Using premium materials makes a difference in longevity and safety. High-quality glass matches the original manufacturer’s specifications, maintaining optical clarity and UV protection. Inferior glass can distort vision or weaken under pressure. The adhesive used is equally important; certified urethane provides the resilience necessary to withstand weather changes, vibration, and impact.
Professional shops source their materials from trusted suppliers, ensuring that each component contributes to the windshield’s durability. This investment translates to fewer repairs and longer service life. High-quality materials not only enhance the structural integrity of the vehicle but also preserve resale value. In the long run, choosing superior products means safer driving, better performance, and confidence that every mile you travel is protected by reliability you can depend on.
Conclusion
From the first inspection to the final quality check, windshield replacement is a meticulous process that combines skill, precision, and dedication. Each step ensures the safety and longevity of your vehicle while restoring its clarity and protection. When handled by professionals, this service transforms a damaged view into a renewed window of confidence on the road. For expert windshield replacement and glass repair, contact Vista Glass Marana, proudly serving the Marana community. Call 520-999-2659 or email CSR@vistaglass.com to schedule your service today.