
Filing an insurance claim after your window shatters isn’t exactly anyone’s idea of a good day. Between the rush of panic, the noise of breaking glass, and the uncertainty that follows, it’s easy to feel overwhelmed. Yet, there’s a method to the chaos. Knowing how to navigate your insurance coverage during an emergency glass replacement can transform confusion into calm action. This process isn’t just about paperwork; it’s about reclaiming peace of mind, one pane at a time. When your home or business is exposed to the elements, the last thing you want is hesitation. Acting swiftly—while documenting every detail—ensures you get fair compensation without unnecessary stress. The trick lies in understanding the fine print, communicating effectively with your insurer, and partnering with glass professionals who know how to document damage precisely. With the right guidance, your broken window becomes less of a disaster and more of a solved problem waiting to happen.
Understanding What Insurance Covers for Glass Damage
Insurance policies often sound like riddles—carefully worded to protect both you and the insurer. But beneath the jargon lies something simple: most property insurance covers accidental glass damage. Whether from a storm, vandalism, or a stray baseball, if the cause isn’t negligence or intentional damage, you’re likely covered. What’s crucial is determining if your policy includes “accidental breakage” or “glass coverage.” These terms decide how much of the repair cost your insurer will shoulder.
Another hidden gem in some policies is “emergency response coverage,” which reimburses same-day repairs—ideal when security or weather exposure is a concern. Always start by reading your policy’s exclusions. Some limit coverage to exterior windows, while others extend to interior partitions or storefront glass. Knowing this before you file saves time and arguments later. Ultimately, understanding coverage means less guesswork and faster action when disaster strikes, keeping your space secure and your claims efficient.
Step One Gather Evidence Before Making the Call
The first instinct after hearing the crash of breaking glass is to clean it up—but resist that urge. Evidence is everything when filing a claim. Start by photographing the scene before touching anything. Capture multiple angles, include close-ups of shattered sections, and, if possible, document the cause—like fallen branches or visible impact marks.
Next, write down the time, date, and weather conditions. If a third party caused the break, gather their details too. These records build a credible story for your insurer and help professionals assess repair needs accurately. Keep any damaged glass fragments in a safe place if they’re relevant to the claim. Once your evidence is in order, you can safely board up the area to prevent injury or intrusion. Gathering proof before cleanup turns what could be a dispute into a straightforward process supported by solid documentation.
Step Two Contact Your Insurance Provider Immediately
Time isn’t your friend in emergencies. The sooner you report the damage, the smoother the process. Insurance companies often require claims to be filed within a certain timeframe—sometimes within 24 hours. Waiting too long can complicate or even void coverage. When you call, have your policy number, photos, and a brief account of what happened ready.
During your initial report, ask about emergency repair authorization. Some insurers allow immediate professional intervention, while others require an adjuster’s inspection first. Be clear, calm, and factual—this sets the tone for a cooperative claim process. If possible, follow up your call with an email summary, confirming details and any verbal authorizations given. Quick communication not only accelerates your claim but also demonstrates responsibility, which can favor your case. The key here is urgency paired with clarity—ensuring every moment counts toward resolution, not delay.
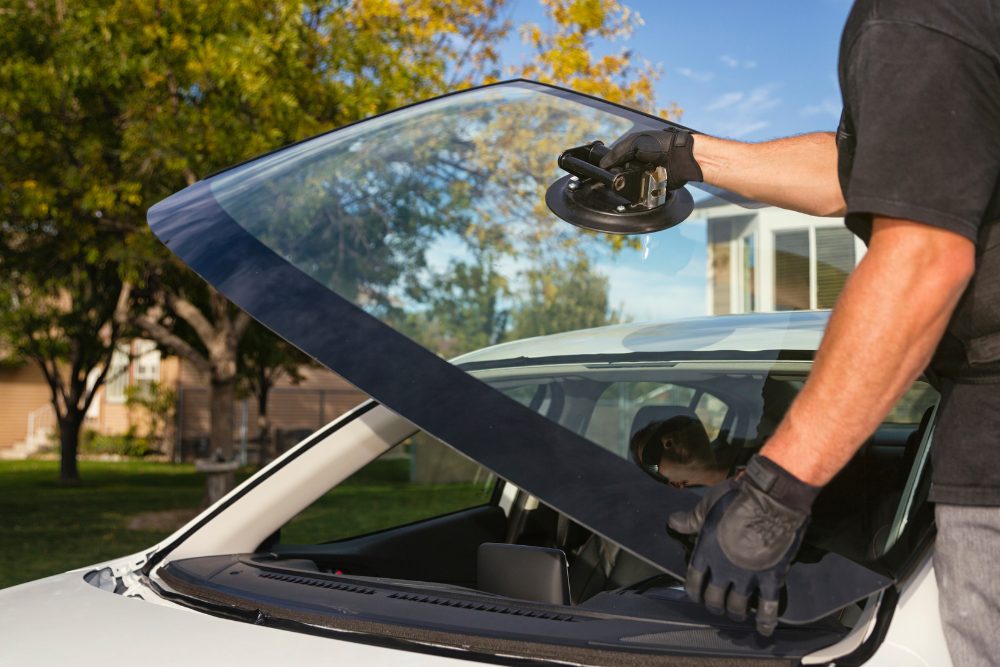
Step Three Schedule an Emergency Inspection
Once your insurer acknowledges your claim, it’s time to get professionals involved. An emergency glass inspection determines the extent of the damage and provides the estimate your insurer will rely on. Most reputable glass companies offer same-day assessments, ensuring your home or storefront isn’t left exposed longer than necessary.
During inspection, technicians measure the opening precisely and evaluate whether a temporary board-up is needed. They’ll also note frame damage, safety hazards, or special materials like tempered or laminated glass. Make sure their report includes everything—the more detailed it is, the faster your insurance can approve repairs. A written quote, photos, and certification of safety standards create a clear, undeniable record. This stage bridges communication between you and your insurer, removing uncertainty. Think of it as the professional confirmation that your claim needs to move forward efficiently and transparently.
Step Four Secure Temporary Protection
Waiting for replacement glass doesn’t mean leaving your property vulnerable. A reliable emergency glass service can install a secure temporary board-up, sealing the area against weather and trespassers. This step isn’t just practical—it’s often a requirement under most insurance policies. Failing to protect the damaged area might be seen as negligence, which could reduce coverage.
A professional board-up uses sturdy materials and weather-resistant sealing methods, preserving both interior comfort and safety. If the damage occurred in a high-traffic area or at a storefront, technicians can design transparent temporary coverings that maintain visibility without compromising security. Keep receipts and photos of the board-up, as these can be reimbursed by your insurance provider. This temporary fix buys time while ensuring compliance with policy obligations—a proactive move that shows your insurer you’ve done everything right from the beginning.
Step Five Obtain a Professional Estimate
After safety is restored, request a comprehensive estimate for replacement. The document should break down material costs, labor, disposal fees, and any additional services like weatherproof sealing or custom cutting. Insurers prefer transparent, itemized quotes because they leave no room for guesswork.
When selecting a glass repair company, choose one that understands how to work with insurers. They’ll know the correct codes, descriptions, and language needed for claim approvals. A professional estimate becomes the backbone of your insurance negotiation. It helps prevent underpayment and ensures you’re getting value aligned with the quality of materials being used. Comparing this estimate with your policy’s deductible clarifies your out-of-pocket expenses. A trustworthy service provider transforms what could be bureaucratic red tape into a smooth, organized experience where every number tells your side of the story accurately.
Step Six Coordinate Adjuster Visits and Documentation
Once the claim progresses, an insurance adjuster will typically visit to verify the damage and validate repair costs. Cooperation is crucial during this phase. Meet them on-site if possible, or have your glass technician present to explain technical details. Their professional insight can clarify why certain materials or safety measures are necessary.
Provide the adjuster with your photos, written notes, and the repair estimate. Having everything organized saves time and demonstrates transparency. If the adjuster requests additional documentation, respond promptly. Remember, their goal isn’t to dispute your claim—it’s to confirm accuracy. When all evidence aligns, approval often follows quickly. Keep copies of all signed forms, reports, and communications. In the insurance world, meticulous records are your strongest defense against delays or misunderstandings. Smooth cooperation during inspection ensures your repair moves from pending paperwork to approved restoration with minimal friction.
Step Seven Approve and Schedule the Replacement
Once the claim is approved, it’s time for installation. Confirm the final scope of work with both your insurer and the glass company before signing off. This includes verifying measurements, glass type, tinting, and any framing repairs. Ask for an estimated completion date and confirm whether post-installation cleanup is included.
Scheduling should prioritize convenience but never compromise safety. Experienced teams coordinate directly with insurance representatives, ensuring invoices and warranties align with claim expectations. Once installation begins, watch how seamlessly professionals handle the process—from removing debris to aligning new glass panels perfectly within the frame. The moment you hear that soft click of a sealed edge, relief sets in. A transparent pane might seem like a small detail, but it restores both security and peace. Filing claims may be paperwork-heavy, but this stage is where all the diligence finally pays off.
Step Eight Finalize Payment and Warranty Paperwork
After the replacement is complete, finalize all documents to close your claim properly. Your glass company will issue an invoice detailing materials and labor, while your insurer will release payment based on approved coverage. Keep copies of everything—receipts, claim forms, even emails confirming completion.
Many glass services offer warranties for installation and materials, sometimes spanning several years. These warranties should be attached to your claim file for future reference. Confirm with your insurer whether deductibles apply or if any reimbursement will follow. Settling payment efficiently ensures your claim doesn’t linger unresolved in the system. More importantly, it gives you a full record of accountability—proof that every step was handled professionally and transparently. It’s the quiet end of a process that began with chaos, concluding with documentation that safeguards your home, business, and peace of mind for years ahead.
Preventing Future Glass Emergencies
While no one plans for glass to break, small preventive habits can make future incidents less stressful. Regularly inspect window seals, frames, and locks for early signs of wear. Trim nearby tree branches that could turn into projectiles during storms. For businesses, invest in safety film or laminated glass that resists shattering under impact.
Maintaining records of each inspection and minor repair helps too—it creates an ongoing history that insurers appreciate during future claims. Many professional glass services offer routine maintenance programs designed to catch vulnerabilities before they escalate into emergencies. This forward-thinking approach not only minimizes damage but also strengthens your insurance standing over time. Prevention may not guarantee immunity from accidents, but it does ensure that when life throws you another unexpected break, you’ll already know exactly what to do and who to call.
Conclusion
Filing an insurance claim for emergency glass replacement might seem like a daunting maze, but once you understand its rhythm, it becomes manageable and even empowering. Each stage—from capturing evidence to coordinating with adjusters—plays a vital role in ensuring fair coverage and timely restoration. The key is to act swiftly, document thoroughly, and rely on skilled professionals who bridge the gap between damage and recovery. When the shards settle and calm returns, you’ll find that organization and clear communication are as vital as the glass itself. For reliable service and expert assistance in navigating emergency replacements, contact Vista Glass Marana in Marana at 520-999-2659 or email CSR@vistaglass.com—they’re ready to bring clarity back to your world when it matters most.