
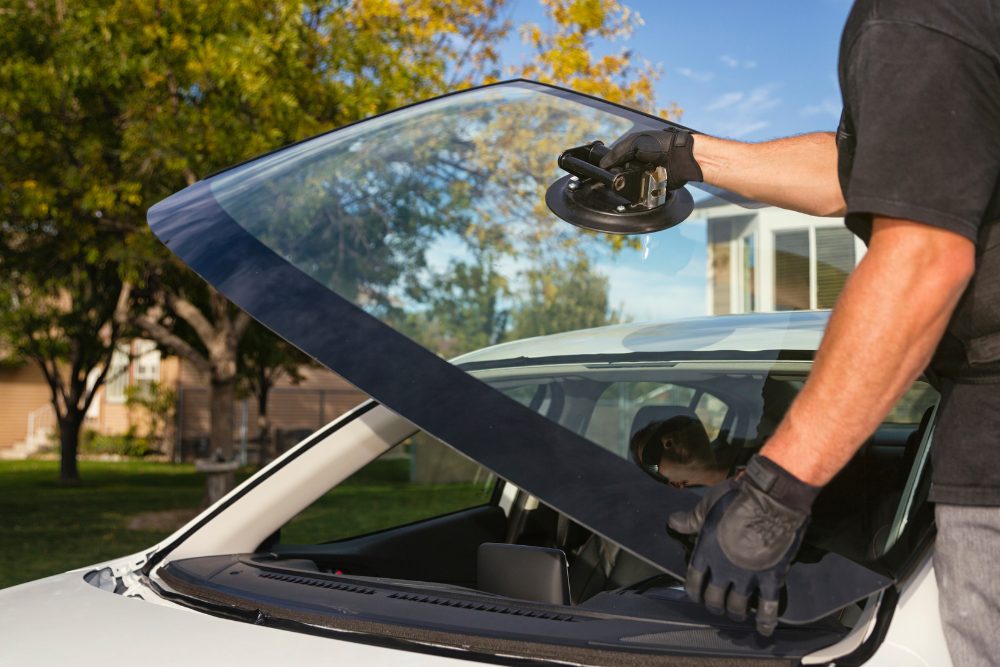
After replacing your windshield, the job isn’t done the moment you drive away. The glass may look pristine, but subtle imperfections or installation errors can quietly form underneath the surface. The first few days are critical—a period where adhesive cures, seals adjust, and pressure redistributes across the vehicle frame. This is when the smallest misstep can lead to leaks, rattles, or visibility distortions that escape the untrained eye. Checking for potential issues after windshield replacement helps ensure your investment lasts, your safety stays intact, and your visibility remains flawless on the road ahead. A few quick inspections and mindful observations can save you from future expenses and unnecessary stress. It’s about taking ownership of your vehicle’s wellbeing, noticing what others might overlook, and ensuring your newly installed glass truly performs as promised.
Examine the Perimeter for Uneven Seals
Once the replacement is complete, your windshield’s perimeter becomes the barrier between the elements and your cabin. Take a slow walk around the car and inspect the edges under direct light. Look for inconsistent bead lines, irregular adhesive application, or air bubbles near the frame. These subtle inconsistencies can evolve into leaks or compromise the windshield’s hold during vibration or impact.
If the rubber molding appears slightly lifted or uneven, resist pressing it down yourself. The curing adhesive beneath is still bonding, and touching it can weaken its integrity. Instead, take photos of what you see and share them with your installer for evaluation. Professional auto glass technicians can reseal minor imperfections without repeating the entire process, saving both time and money. Early awareness is your first line of defense against premature detachment or water intrusion.
Listen for Whistling or Air Leakage While Driving
A newly replaced windshield should feel like silence—no rattle, no hum, no whisper of air slicing through cracks. If you notice faint whistling sounds when accelerating or crossing windy stretches, something might be off with the seal. This could indicate an incomplete bond or a minute gap that escaped inspection.
Try listening closely at various speeds and note when the sound begins or fades. Air leaks usually occur near the corners or along the top edge, especially if the molding wasn’t perfectly aligned. Ignoring it allows dust, water, and even mold growth in the hidden layers of your dash. Have it checked promptly; a skilled glass technician can inject sealant or realign edges without removing the whole windshield again. A quiet cabin means your installation is airtight and structurally sound.
Test the Wiper Blades for Smooth Motion
Many drivers overlook how wipers interact with freshly installed glass. Yet, uneven contact or streaking often signals a misalignment in windshield curvature or improper blade angle. Run your wipers dry once, then with washer fluid. Watch their motion carefully. They should glide without skipping, lifting, or leaving a haze behind.
If they chatter or leave arcs of untouched glass, it’s worth asking your installer to verify the fit. Sometimes the new windshield sits microscopically higher or lower than the previous one, altering how wipers rest. Replacing or adjusting the blades can correct it, but in rare cases, recalibration of the wiper arm is necessary. Clear, smooth movement isn’t just about visibility—it confirms that the windshield sits in perfect contour with the frame, sealing the deal between performance and precision.
Check for Visual Distortion Under Sunlight
One of the simplest yet most telling checks is to observe your windshield under natural light. Sit in the driver’s seat during the day and look at reflected lines, especially those from nearby buildings or poles. Any wavy distortion or rainbow tinting across the glass suggests manufacturing defects or uneven pressure during installation.
Some optical warping is minor, but consistent rippling in your field of view can cause eyestrain and misjudgment of distance on the road. Since modern windshields feature layered construction with interlayers of resin, a flaw in lamination can be mistaken for installation error. Bring it to the shop for clarification—reputable glass specialists can distinguish between factory imperfection and mounting stress. Crisp, undistorted clarity ensures both comfort and optical safety on every drive.
Inspect the Interior for Residual Smell or Moisture
A faint chemical scent is normal right after replacement—adhesive curing releases mild fumes for up to 48 hours. But a strong, lingering odor or moisture under your dashboard signals trouble. Persistent humidity could mean the seal wasn’t complete, allowing water intrusion around the edges.
Check beneath the dash mat and along the A-pillars for dampness. Condensation marks on the inner glass or unexplained fog buildup during early mornings can also reveal slow leaks. Air out the cabin and monitor how quickly the odor fades. If it persists beyond two days, contact your technician for a reseal inspection. Quick detection prevents mold growth and preserves the structural integrity of both your glass and adhesive layers. A dry, neutral-scented cabin marks a well-bonded windshield.
Observe the Dashboard for Stress Cracks or Pressure Marks
A windshield plays a vital role in the car’s structural strength. During installation, the surrounding frame must align precisely with the glass contour. If that balance shifts, subtle stress marks can appear near the corners of your dashboard or along the upper trim.
These hairline impressions often indicate that the glass is exerting uneven pressure on the vehicle body, especially if the old adhesive wasn’t fully removed before the new one was applied. Leave them unchecked, and they can worsen with vibration or temperature change. Use gentle touch—if the trim feels tighter or squeaks under light pressure, schedule a quick inspection. Skilled professionals can rebalance the adhesive depth, preserving your car’s structural harmony before minor strain turns into serious cracking.
Confirm That Sensors and Cameras Are Properly Calibrated
Modern vehicles rely heavily on built-in sensors—rain detectors, lane-assist cameras, and forward collision systems—all integrated near the windshield. After replacement, even the slightest shift in glass angle can misalign these sensitive components.
During your first drive, test your vehicle’s automated systems: does the wiper activate correctly during drizzle? Does lane departure alert respond as usual? A sudden increase in false alarms or sensor inactivity might mean recalibration was skipped or done improperly. Many glass service centers have specialized equipment to restore precision alignment. Confirm this service was performed, especially if your car features ADAS (Advanced Driver Assistance Systems). Proper calibration ensures technology sees what you see, keeping safety systems sharp and dependable.
Monitor for Unusual Vibrations or Frame Noise
Vibrations that weren’t there before could mean your windshield isn’t seated evenly. As you drive over uneven terrain or speed bumps, listen for tapping sounds or rattles around the upper edges. These noises often come from incomplete adhesive contact or misaligned clips.
Sometimes the bonding agent cures unevenly if environmental conditions during installation—like humidity or temperature—fluctuated beyond recommended levels. Such imperfections may cause micro-movements between the glass and frame, creating faint resonant vibrations. These may start subtle but can amplify over time, risking detachment under stress. If noticed early, your installer can reseal or reinforce the bonding without needing a full replacement. Your ride should feel solid, silent, and unified—a reflection of expert workmanship.
Evaluate Temperature Resistance During Early Curing
Adhesive curing is temperature-sensitive. Exposing your vehicle to extreme heat or cold immediately after replacement can affect how the glue hardens. To test if curing remains intact, observe how your windshield behaves after overnight temperature shifts. If small gaps form near the corners or seals appear loose, the bonding may have hardened unevenly.
Avoid high-pressure car washes or parking under direct sunlight for at least two days. Gently clean the glass using a soft microfiber cloth instead. Thermal stress is invisible but powerful—it can twist bonding layers and compromise the windshield’s fit. By giving your car a controlled environment to settle, you prevent adhesive distortion and ensure your new glass ages gracefully.
Watch the Edges for Signs of Paint Damage
When installers remove the old windshield, the surrounding paint and metal frame are vulnerable. If scratched or chipped, these spots can later lead to rust beneath the sealant. Take a close look at the edges from outside the car. Any exposed metal or uneven paint texture could mean minor bodywork was overlooked.
Left untreated, moisture seeps through and corrodes the frame, loosening the windshield’s base over time. Use a flashlight or sunlight reflection to scan the entire perimeter, especially the lower corners where debris tends to settle. Prompt touch-up paint or sealant from a professional prevents corrosion before it spreads. A clean, uniform frame enhances both aesthetics and long-term durability.
Check Rearview Mirror Stability and Mounting
The rearview mirror attaches directly to the windshield surface, often secured with specialized adhesive. After a replacement, that bond needs time to fully cure. Test its firmness gently—if it wobbles or shifts under slight pressure, it might not have adhered properly.
A loose mirror not only disrupts visibility but can strain the new glass when vibration occurs. Never reattach or tighten it yourself; the installer uses calibrated materials designed to handle thermal expansion without cracking the surface. If instability appears, request professional re-mounting to avoid hairline fractures around the attachment point. A secure mirror signals a stable surface, showing your new windshield is perfectly bonded and balanced for everyday driving.
Conclusion
Your windshield’s performance depends on how carefully you observe it in the days following installation. Every sound, reflection, and seal tells a story about quality and precision. By inspecting your vehicle using these methods, you safeguard both your safety and your investment—ensuring your glass not only looks flawless but functions flawlessly too.
For professional inspection, repair, or replacement services, contact Vista Glass Marana in Marana. Their experienced team ensures every windshield meets top safety and quality standards. You can reach them at 520-999-2659 or email CSR@vistaglass.com for expert assistance and guidance.